Welcome, Leaders. Here, you'll find tips and tricks from various other Leaders to help you and your compound survive in the harsh environment of the Dead Zone.
Compound defense[]
|
Upper Left Wing |
Compound Building | Upper Right Wing |
|---|---|---|
|
Left Wing |
Front Entrance | Right Wing |
| Road | Road |
Road |
This is the basic layout of the compound. Zombies will attack from all directions while raiders must deploy from a specific point of their choice anywhere on the Roads.
- Never use melee weapons unless you have nothing better available, since guns have no ammo cost during compound defense.
- Never assign more than one survivor per barricade. That way, if the barricade goes down, only one survivor will be left standing in the open. Also, this means that raiders can only suppress one survivor at a time.
- Make sure your survivors have the best equipment available.
- Assign survivors with long-ranged weaponry, such as a Long Rifle, to Watchtowers to increase their range further, either allowing them to pick off and weaken the zombies before they reach the barricades or preventing raiders from simply picking off your survivors one by one with their own long-range weapons.
- When placing Watchtowers, never place them out in the open because they have a minimum range (indicated by a circular zone shaded in red) where the survivor in the tower cannot attack. Surround them with strong barricades to protect them.
- Place your traps in the right spots! A Scatterbomb is no good if it's in a corner of the map that nothing ever goes to.
- Wire Traps are best placed around manned barricades, as the traps can hamper enemy movement while the defending survivors fleece them with bullets.
- Place your traps in choke points where any foe would have to go, in order to inflict that maximum casualties.
Versus Zombies[]
- The type and level of the zombies that appear is dependent on the Leader's level. Their numbers are also affected.
- Zombies will focus on going after your survivors and will bash through barricades and barriers in their way.
- Build barriers (Barrier - Wire and Barrier - Spikes) to slow down attacks. Be sure that there are survivors assigned to them or in watchtowers overlooking them.
Strategies[]
- The most effective strategy is to clump all your defenses in one area, so that the zombies will have to deal with the combined firepower of all survivors at once, as well as any placed traps. Be mindful though! Remember, raiders are not dumb![n 1]
Versus Raiders[]
- Protect your most vital hardware, such as the F.U.E.L. Generator. Also, protect resource-related structures and any other points of interest in your compound that would attract your average raider.
- To secure resources, pick a specific spot in your compound, and build your defense around it. Plan for strategic weak points, either by a thought experiment, watching zombie attacks, asking a friend to raid you and give their thoughts/record it so you can review it, or run a Practice Raid.
- The Alliance Banner will be the prime target of nearly every raider, and is required to help their alliance gain rank. Don't give the raider an easy victory and make strong defenses around the banner. Put traps around it as well.
- Build an elaborate defense that would force raiders to make risky choices in the process in order to maximize your efficiency.
- Try to make your defense look weak, but not so weak that the raider charges in head-on. Alternately, make your defense look very imposing, which should scare off at least a few raiders.
- Think of every scenario possible as to what an enemy will be doing. Always assume your enemy will be a higher level and consider what weaponry will be required for success.
- Try to lay traps in strategic points that are not too obvious. This makes it more likely for careless raiders to blunder into them.
- Try to leave a large gap with as few objects that can provide Cover as possible between your defensive positions and the road. This means that any raiders will either have to snipe from a distance or risk closing in without any protection from your survivors' shots.[n 2]
- If possible, try to hide some survivors (from the raiding player's point of view) behind buildings so that the enemy will be in for a nasty surprise if they get close.
- Try to defend against outflanking.
- Put some accessories with Suppression resistance on your survivors paired along with survivors on different defenses to maximize your survivors chances a bit more of not getting pinned down quickly while defending.
- Try to cover the spawn areas with as much firepower as possible so you can bog the enemy down as they spawn and kill them before they can begin their attack.[n 3]
- The best defense is not to be raided at all, so equipping the White Flag book, buying Protection, or simply choosing not to raid other compounds will reduce or eliminate the chances of you being raided.
Strategies[]
- Clump all your defenses and resource buildings in one area, so that any raiders will have to deal with all 10 survivors at once, as well as any placed traps. This is vulnerable to grenades and explosive charges, but it's much harder for the raiders to pick off your survivors.
- One variant of this strategy is to equip all survivors with long-ranged weapons, and to place all raidable structures outside, but close, your chosen defensive position, except the F.U.E.L. Generator. This will allow you to build two to three layers of barricades, reducing vulnerability to explosives and suppression, while also forcing the raiders to come into your line of fire.
- Use the junk piles early on as a cost effective obstructed barrier for zombies and players alike.
- To avoid wasting resources for fuel generation, it is advisable to never restock the F.U.E.L. Generator unless you have all your survivors defending the compound, and never send them away on missions (unless they can return quickly, or it is worth the risk) to ensure that there is always someone guarding your compound.
- Mix actual traps with decoys. This will either lull raiders into a false sense of security and make them careless, or force them to treat every trap as a real one and waste either their time in disarming all of them or their explosives in trying to destroy them safely.
- Be a Good Samaritan and a Neighborhood Handyman. People are less likely to attack those who have helped them in the past. By speeding up other peoples' building/upgrading times, one reduces the odds that the other will attack them. It doesn't always work, but most people mind their manners, and are nice towards those who have helped them out, and are likely to return the favor.
Scavenging and Missions[]
- Don't send a mission to a higher level location unless you're after XP, large amounts of resources, or a challenge. Even if you succeed, you might not be able to use the equipment you just scavenged until your survivors reach that level (though occasionally you may find lower level equipment you can use). Missions considered tough (above your survivors' average level) will have a skull displayed to the right of the mission level (when selecting your squad to send on a mission).
- Make sure to give your survivors the proper equipment based on the location type and level, as well as the survivor's specializations. You don't want to be running into a Level 20 horde with a Level 10 weapon.
- Make sure to leave some ammo for subsequent missions.[n 4]
- It's preferable to have at least one Scavenger on all missions, since a lot of time will be spent searching containers.[n 5]
- Bring someone who can heal, like your Leader or a Medic. There are an infinite amount of zombies, and a very finite number of survivors. Any wounds they take can add up into an incapacitation if their health isn't topped up.
- Bring someone who is specialized in melee and has a lot of health, or a "tank" (A Fighter with a vest that provides a massive boost in health will suffice). These survivors can serve as a shock absorber for fierce zombie hordes; giving the tank a melee weapon with high knockback can hold off infected as well. Be sure to back the tank up with sufficient firepower and a decent medic. Always keep the tank's health topped, or they will eventually fail.
- Survivors are vulnerable while scavenging, so it's a good idea to have another survivor covering them, preferably with a ranged weapon that has a large magazine.
- Try to bring a balanced team of at least 2 survivors (1 combat specialist, 1 scavenger or 1 healer).
- Bring an appropriate amount of survivors for the mission. Running a mission on a low-level location generally requires fewer survivors. The extra survivors can be used to run more missions. On higher level missions, having more survivors increases the chance of survival, and will provide sufficient firepower to protect the scavenger.
- If preferred, "organize" your survivors in the order you assign them. The survivor in the first slot is placed first in the survivor selection menu at the bottom. These correspond to the respective keyboard shortcuts. Pressing "1" will select the first survivor, "2" will select the second survivor, and so on. For example, assign your designated scavenger at the last slot, so on a mission with 5 survivors, pressing "5" will select the scavenger.
- Focus on searching containers, the clock is constantly ticking and there will always be another wave of zombies coming.
- Scan the entire map when you are done and make sure every container has been searched. Don't forget to check behind walls by rotating the view or hovering the mouse cursor over it. Remember that when all containers are searched the Scavenger! mini-task will be completed.
- If there is less than one minute on the clock, send all your survivors to the safe zone, even if there are still unscavenged containers. Sometimes, it is better to leave what might be a treasure trove behind than it is to deal with the costly morale penalties and severe injuries that will be incurred.
- If you really want to loot those last containers, make sure that at least one survivor is on the safe zone, so you don't lose all the items you've already earned.
Combat[]
- Keep your survivors together. Lone survivors may be able to fend off a few zombies by themselves, but a decently sized group can overwhelm them when they need to reload or if they get surrounded. Grouping your survivors will allow them to blast zombies off reloading/surrounded survivors.
- Zombies will only spawn in decently-sized groups from the two spawns closest to your survivors. Keep as far away from them as possible, especially with lone survivors.
- Place your more durable survivors in between your other survivors and the closest zombie spawns. This makes it more likely that the zombies will target them first instead of the more easily incapacitated survivors.
- Noise attracts zombies; sometimes it's better to have a less powerful but quieter weapon, especially if operating with few survivors in large areas.
- Pay close attention to the way the walls and objects around you affect horde movements - if zombies from one spawn point have to run further than the others to get at you, you can defeat one group before the other arrives.
- Keep in mind the reload times and ammo capacity of your firearms and plan your actions accordingly. A fast-loading, large capacity weapon is better for mobility; a powerful, slow-loading weapon is best used for holding ground.
- Always reload your firearms by pressing the 'R' key or by clicking the weapon's icon at the bottom once the coast is clear of zombies; a full magazine can be the difference between surviving and getting overrun.
- Don't underestimate the power of melee weapons. Combined with a strong survivor (fighter/leader) wearing armor they are ideal for holding off hordes of zombies, especially at a chokepoint in the map (e.g. doors). Weapons with good knockback effect are particularly suitable for this.
- If a horde gets too big for you to handle you can always use one survivor to distract them while the rest of your group picks them off. Any survivor except Fighters (who are too slow) can do this.
- Survivors generally attack and move faster than zombies. With enough micromanagement and timing, survivors using melee weapons can attack and then retreat before zombies have a chance to attack back. If executed well, a single survivor can draw the attention of an entire mob of zombies and take minimal damage, while the other survivors in the team fire without fear of taking damage from afar.
- If your group does not have enough firepower (especially during rushes and fighting against elites), try to draw the infected away from your ranged group using your melee survivor. Not only does this give your survivors time to reload, but all attacks to the back of an infected are guaranteed to critically strike, doubling your team's damage output.
- If you want, try to milk XP and achievement progress by waiting near or in the safe zone until the timer ends and kill as many zombies as safely possible.
- If a horde attack begins, focus on fending the attack off and concentrate all your survivors together.
- If all else fails, retreat.
Where to find specific item types[]
- Large Supermarkets are the go-to place for Food and Water.
- Large Hardware Stores are the best for construction resources, generally giving several hundred to more than a thousand each of Wood, Metal and Cloth. They first become available in Trenton proper when the player reaches level 14.
- Warehouses, including Small Warehouses, contain a wide variety of components and junk, along with a decent amount of resources and the occasional weapon.
- Gun Stores, Police Stations, Streets, Military Bases and Security buildings tend to have more weapons, gear and Ammunition than other areas.
- Large Parks, Military Bases and Highways are always the highest level location in a specific area, making them the best place to go for strong equipment.
- Hospitals and Large Residences are good places to find Medical Items and gear.
- Construction Sites and Depots grant large amounts of wood and metal, but less cloth than usual.
- Unidentified Buildings have 4 different layouts and each one is random, so it's a gamble. The layouts are: a supermarket which yields food/water, a medical clinic which yields medical supplies, a gun store which yield weapons and ammo, and a hardware store which yields resources and components.
XP hunting[]
- Non-Leader survivors only gain XP for missions that they are on. Therefore, splitting up your survivors so you can do more missions at the same time only (directly) causes your Leader to gain XP faster, not the rest of your survivors. As such, to level up your non-Leader survivors, it is best to run full teams of five against the highest-level missions available.[n 6]
- Larger maps like Large Parks, Warehouses, Highways, Military Bases, Bridges, Prisons and Streets tend to have more searchable containers and have a higher zombie spawn rate, leading to more potential XP gain.
- If you're willing or if you're in desperate need of XP, a "Boost Your Experience" book will increase the amount of XP you earn.
- If you're willing to risk it, use challenge books to further increase the amount of XP you earn, at the cost of penalties to some of your capabilities.
- Go on higher level missions to get more XP. Be aware that return times will be longer, however, and the mission will be more difficult.
- If you want to keep levels even, it's a good idea to send your leader and higher level survivors on automated missions as they will come back with resources, but will not gain XP.
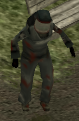
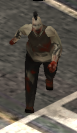
Zombie types[]
- Main article: Zombie
The primary enemy you'll encounter out in the Dead Zone. Each type has its own strengths and weaknesses.
All zombies have a chance of interrupting reloads if they hit a survivor, and healing will always be interrupted. Try to move reloading and wounded survivors behind your other survivors if the zombies manage to close in, or at least make sure to cover them with your other survivors.
The main weakness all zombie types share is needing to get into melee range, so staying a good distance away is always a good idea.
Shambling[]
The most common zombie type in the game, they're not fast, hard-hitting or durable, but there are a lot of them. Individually, they're not that great, but they get annoying and dangerous in large groups, especially if supported by other zombie types.
Keep your distance when there are a lot of them. If they're isolated in small groups, closing in is viable.
They appear in any Level horde, though their numbers may vary.
Runners[]
Otherwise identical to regular zombies, these can move much faster, letting them close the distance more quickly. There's no way of telling them apart from regular zombies until they spot your survivors. They also have slightly less health.
They tend to run in ahead of their slower counterparts, so drawing their attention, then retreating to regroup and reload after killing them before taking on the rest may be a good idea.
They start appearing in Level 3+ hordes.
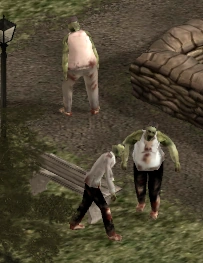
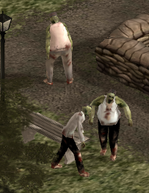
Fat[]
A Fat Zombie
They behave exactly like regular zombies, but have increased health at the cost of being slightly slower. Some can run, but are indistinguishable from other fat zombies until they spot a survivor. In either case, they can absorb more firepower than regular zombies, possibly allowing them to close in while the survivors are occupied.
Stay on the move and try to keep some distance. Eliminating their faster comrades first will help with this.
They start appearing in Level 6+ hordes.
Armored[]
Even more durable than the Fat Zombies, but with no speed penalty. These are very dangerous, and should be among the first to be taken out. There are three kinds, Police, Military and HERC. The first two have equal durability, but HERC zombies are even tougher. Some can even run, making them even more dangerous.
Focus fire with your strongest weapons. Keep your survivors together to provide maximum power.
They start appearing in Level 14+, 16+ and 18+ hordes, respectively.

Riot[]
A Riot Zombie
Riot Zombies are the most durable zombie type around, though they're slightly slower, never run and rarely appear. Nonetheless, they can absorb amazing amounts of firepower before dropping, potentially granting other zombies enough time to close in.
Take out any supporting zombies, then focus fire with your strongest weapons. Move if it gets too close.
They start appearing in Level 25+ hordes.
Bruiser[]
A Bruiser
Bruisers hit hard and are durable (though not quite as durable as Armored Zombies), and some of them can run. In addition, their great strength will always knockback survivors, temporarily stunning them. This may allow any other zombies in the area to close in, and a lone survivor will easily be overrun.
Focus fire on these first and always try to keep your distance. Keep your survivors grouped together to concentrate firepower and cover any stunned survivors.
They start appearing in Level 16+ hordes.
Rotter[]
A small group of rotters
Basically harder-hitting and more durable versions of Shambling, Runner, Fat and occasionally Armored Zombies, use the same tactics as you would against their base zombie type. Just keep in mind that they're stronger overall.
They start appearing in Level 20+ hordes.
Rushes[]
A zombie horde may randomly attack from all zombie spawns and will immediately head for the nearest survivor. Ideally, you'd want to keep your survivors grouped up at all times, just in case. Also, it would be a good idea to pick out a defensible location or two beforehand to help even the odds.[n 7]
As soon as you hear the musical cue and see the red on the screen, have every survivor group up to concentrate firepower. If anyone is scavenging, have them stop and help fend off the attack.
They can appear in any Level mission, though their strength, numbers and constituent types depends on the location's Level.
Attracting new survivors[]

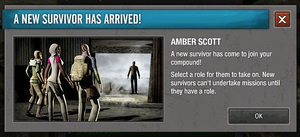
The message shown when a new survivor arrives.
- Always check the Compound Progress Report, which can be accessed by clicking on the blue bar at the top right of the compound screen.
- Keep building and upgrading comfort/security buildings and expanding your food and water storage capacity even if the Compound Progress Report does not specifically require it.
- Emphasize whatever you are low on. If you have bad morale, you need to improve it. If you have low security, build or upgrade security structures.
Choosing a Survivor Class[]
Each class tends to be specialized and has unique abilities, so keep in mind the classes of the other survivors you already have and your Leader's stats. Choose a class based on what capabilities you need more of.
- Fighters for versatile combat skills and taking hits for other survivors.
- Recons for picking off enemies at a distance and spotting traps.
- Engineers for melee combat or improvised weapons and trap disarming.
- Scavengers for scavenging quickly.
- Medics for keeping your survivor's health topped up.


Raiding[]

- Main article: Raiding
Raiding is a highly risky method of gaining large amounts of XP and Resources, and is an ever-present threat even if you're not a raider yourself. Make sure you're ready to take the plunge, since you'll have a tough time getting back out once you're in the raiding business.
You can also use the White Flag book to completely turn off the risk of being raided, at the cost of being unable to raid others. However, it is very expensive and costs over 1250 ![]() , necessitating fuel saving.
, necessitating fuel saving.
You can only raid:
- Players who are at the same level as you.
- Players who are one level lower than you.
- Players up to 5 levels higher your current level, though they will not be able to raid you. However, attacking them does open you up to retaliation raids.
Raids have slightly different features than regular missions:
- Increased 8 minute time limit.
- Change of enemy from Zombies to human survivors with weapons.
- Suppression and Cover are available.
- Scavenging can only be carried out by holding down the space bar and left-clicking a building.
- Traps may be present, and can be detected and disabled.[n 8]
- Barricades and other defensive buildings are likely to be in your way.
Suggestions[]
- Always bring a Recon and Engineer to detect and disable traps. Be sure to equip the latter with Trap Tools to enhance their disarming abilities.
- Make sure to know exactly what each kind of trap does and how it behaves.
- Survivors with high health are recommended, as gunfire hurts more than zombie strikes (most of the time). If you need to bring a specialist with low health, buff them up with a vest.
- Visit the targeted compound beforehand to examine their layout. Try to guess the most likely locations for their survivors and traps.
- Use superior equipment. You will not win by using an Uzi against an M249 SAW.
- Cover your survivors' weaknesses and exploit their strengths. Recons may need a Vest to give them more health. Fighters may need Shoes to improve their movement speed.
- Always have grenades handy. Smoke Grenades will reduce the accuracy of any weapon, so your survivors can move to a new position or return fire safely. Hand Grenades are good for killing large groups in or out of cover. Explosive Charges can devastate any defensive structures and unfortunate survivors in the area.
- Have an understanding of Risk vs Reward. Is it worth getting Fuel from their generator or large amounts of resources at the cost of your survivors' safety?
- No plan survives contact with the enemy. Be prepared to improvise.
- Keep in mind that raiding someone lets them put a bounty on you. This will likely mean a large number of raids from prospective bounty hunters.
- Raiding a higher level compound lets them launch retaliation raids against you despite the normal rule against raiding lower level compounds.
- If you're launching revenge raids, send the recipients a message that you are a force to be reckoned with. Raze everything possible and inflict high body counts. This should dissuade them from continuing the fight.
- The F.U.E.L. Generator will have to be restocked with resources when empty, regardless of how much Fuel was in it. Stealing from it as well as their other resources will likely stall their progress. This can be useful if you're currently in a war with them, but may lead them to focus on getting revenge if you're not.
- Scan for traps. This will take patience, but it is better than having your scavenger get shot full of holes with a WOM or finding pieces of them while trying to find materials.
- Cover is directional, so try to outflank your enemies. Punch through the traps and get into the compound building so that you can attack them from behind where their cover will be negligible.
- Bring at least one melee weapon or several explosives to destroy their buildings. Gunfire does minimal damage to structures.
- Always check to make sure your survivors have line of sight to theirs. If not, you cannot fire.
- Cover works both ways, so use the enemy's own buildings to protect you from their fire.
- If you're being raided, always have some spare Fuel to place bounties. This may scare the raider off and prevent them from raiding you again.
- If you're trying to raid someone for their bounty, focus on bringing down their Leader. If you fail to do so, not only will you be unable to collect the bounty, the victim will be allowed to place a bounty on you.
- Take a route that looks unprotected by the defenders' guns. The area will likely have traps, but Recons and Engineers will do the trick. After that, outflank the enemies. Just make sure that the route is not within range of Watchtowers.
- If the enemy has a scattered defense system, use this to your advantage. Clump all your survivors in one group, and use the combined firepower to destroy the scattered defenders with ease.
- Focus on taking out Watchtowers first, to negate the range advantage they provide.
- Try to cover your advances with survivors wielding long ranged weapons.
- If a survivor fails to disarm a trap, it will be automatically triggered, injuring anybody near the trap, including the survivor who was attempting to disarm the trap. Keep your other survivors away from the trap to avoid taking additional casualties, or destroy them from a safe distance with grenades.
- Do NOT run over a trap while it is being disarmed.
- If you are in an alliance, concentrate on stealing your opponent's Alliance Banner above all else.
- When bringing down Compound Doors, be sure to snipe off any hiding survivor or traps before you attack the door itself, as compound doors are often used as a mini-barrier.
- Make sure the enemy survivors within range of any traps are eliminated before attempting to disarm them. Survivors who are in the process of disarming traps are defenseless, and they will be massacred if the enemy can shoot at them.
- Grenades can destroy traps, but it takes a lot of them to do so. Use them wisely!
- Have quality armor!
- Consider whether your survivors need more health or damage resistances. The extra health is useful against all types of damage, but increases the amount of time it takes to fully heal them, while damage resistances are only effective against a specific type of damage, but will not lengthen the healing period.
- Use common sense. If you see a one sided wonder defense, DO NOT charge straight at the teeth of the defense.
- Your first piece of cover will be wherever you spawn your survivors. If you want to advance, it is usually best to take advantage of the enemy's barricades and use them as cover.
- Anticipate where traps are going to be concentrated. A F.U.E.L. Generator or an Alliance Banner will most likely have lots of traps guarding it. Be prepared to employ your Engineer.
- Have multiple specialized classes on the raid. Each one of them have a specific purpose, so all of them should be used.
- DO NOT develop a false sense of security! Just because you might have a well crafted set of armor doesn't mean that concentrated gunfire or a well placed trap can't bring one of your survivors down.
- Send in the right people. Don't send in a scavenger when in fact you may need another fighter or recon.
- Equip the correct protection for the right occasion. If your engineer is likely to face explosives, it is wise to equip them with explosive resistant armor. If you (most likely) are going to face lots of bullets, equip bullet resistant armor.
- Unless you have unique or fully upgraded armor that has 100% bullet resistance, you do not have a bullet proof vest.
- When you finish a raid, steal ammunition, because your survivors need ammo for their missions. Otherwise, steal what you need and get out.
- Again, if all else fails, retreat.
Trading[]
- Main article: Trading
Trading will allow you to trade almost any item[n 9] with other players, and can be used to obtain much-needed supplies, useful equipment or very rare items normally either very hard to find or very expensive to purchase.
Keep in mind that each trade costs a small amount of Fuel to carry out and that you can only trade a limited number of items.
To trade, the Communication System must be activated first. In the chatroom, left click on a player's name and then click the TRADE button from the resulting drop-down menu. If they accept, the trading screen will show up. Both players start with 4 slots and 2 unlockable slots, you can see what they're offering and the Fuel cost for carrying out the trade. There is a private chat tab independent of the main chat room and the Two-Way Radio so you can work out the details in private. Simply click the slot and select an item to trade. Once you're satisfied, click the Accept Trade button at the bottom of the screen. The deal will only be finalized when both players click the Accept Trade button.
- Try to work out the details of the trade with the other player beforehand in the chat.
- If you want to save fuel, see if anyone has a free fuel slot. If you have one, that's good too.
- Look like you mean business. Use proper business etiquette and refrain from swearing or getting emotional.
- Anticipate what the trader may want, and try to give an equally good item to them.
- Be polite. No matter how good a deal you're offering, being rude is a fast way to lose potential trading partners.
- Have something that people will want. Don't trade mediocre items like a Level 1 Rare Long Rifle for a Level 30 Schematic. Trade items that people normally ask for.
- Don't be greedy. Asking for a DCU Combat Helmet in exchange for a few heavy bandages is something you should NOT do in trade.
- Don't make a trade you know you might regret. Trading in a unique M-24 just for a 10% looter isn't really beneficial in the long run.
- Just like the stock market, the value of items rise and fall. Keep track of this, as an item you may have could either rise or drop in value exponentially. Also, remember that a unique SVD may not be as good as a unique M24 in the trade market. Know the value of your items!
- Keys are king in the Dead Zone. Everyone asks for them, and it's becoming increasingly harder to find those who are just willing to trade similar items. If you're gonna trade, have level 3 HERC keys or premium keycards ready.
- if you're not into research, keep the notes handy. You never know if somebody's interested enough in storage or production notes enough to trade uniques and premium keys.
- KEEP SEASONAL CLOTHING! The elite of the game are not immune to nostalgia pangs, and will trade many premium cards for them. Just imagine how much 2012-13 halloween clothes are worth on the market now.
- Beware of scammers! Keep your mouse on the trade button and read if the other user is trying to change an item.
Leveling up[]
Once your survivors gain enough XP, they'll automatically level up. This will increase their stats and allow them to use stronger equipment. This holds true for your Leader as well, but as your compound's level is the same as your Leader's, you also gain access to new buildings, upgrades for those buildings and occasionally new features.
However, as your Leader/compound's level rises, so do the level of the opponents you'll wind up facing.
New equipment[]
Keep hunting for new weapons and gear at all times at locations that are around your survivors' levels. Try not to look for them in higher level locations unless they're about to level up.
Implementing a "hand me down" system would be wise. A strong weapon used by one survivor can be given to another survivor if you get a better weapon for the first one.
Resources[]
Resources are vital to expanding your compound and keeping your survivors happy.
- Always keep some spare resources in case you have to repair any buildings or rearm triggered traps.
- It's best to keep a stockpile of Junk and/or Components and recycle them for resources when necessary, since they can't be stolen by raiders. It's recommended that you take some time to scavenge specifically for components/junk.[n 10]
- Try to use up as much of your construction resources as possible before logging off. It may discourage repeat raids if a raider should manage to break your defenses.
- If you have a F.U.E.L. Generator, don't restock it if you think you can't spare the resources.
- Collect from your F.U.E.L. Generator if you think you are in danger of being raided.
- Try to keep your Food and Water supply topped up, they will affect your survivors' morale and their combat abilities by extension.
- Upgrade your Storage buildings as soon as possible. Any resources collected once they're full will be wasted.
Crafting[]
Crafting allows you to produce useful items without having to constantly go out into the Dead Zone and potentially get your face eaten by a zombie. All items require an amount of Fuel to craft, so keep an eye on your Fuel reserves if you craft a lot.
Crafted weapons and gear with conditions can occasionally receive extra bonuses to said conditions. The chance of getting the bonus is random, as is the strength of the bonus. Certain books can enhance the odds of getting a bonus, so make sure to equip them before crafting.
All crafted items require schematics before you can even start crafting them. Some can be obtained by upgrading the crafting benches (Weapons Bench for weapons and ammo, Gear Bench for gear, Medical Bench for medical items, and Engineering Bench for components - they are also required for crafting), while others must be scavenged in the Dead Zone.
To access the crafting menu, select a crafting bench then the CRAFT button or the schematic and gear button at the bottom left of the compound screen. The crafting menu has the following categories: Weapons, Gear, Components, Medical Items, Ammo and Upgrade. Click on a category to view your schematics collection for that item type. Select one to begin crafting.
Depending on the schematic, an item may require certain components, junk, resources or even another weapon/gear item, in addition to the Fuel cost, before it can be crafted. If you have all the required items, click the green CRAFT NOW button to craft the item. It will be near-instantaneous and the item will be placed in your inventory.
Barring any crafting bonuses, the item you see in the crafting menu will be exactly the item you receive. If it requires a base item, any conditions on that item will not affect the quality of the resulting.
Weapons Types[]
Pistols[]
These weapons are the first ranged weapons you're likely to find. Most are quick to reload and use very little ammo. However, most don't do very much damage, have a limited rate of fire and tend to be short ranged.
Submachine Guns[]
SMGs are a step above handguns, with a high rate of fire whilst still retaining a speedy reload speed and relatively affordable ammo consumption. However, their damage per shot and accuracy tend towards the low side.
Shotguns[]
These weapons offer mind-blowing power, but at the cost of magazine size, reload speed and effective range. In addition, automatic variants tend to be inaccurate. Survivors wielding shotguns should be covered by other survivors at all times.
Assault Rifles[]
Assault rifles deal incredible Damage per Second and are ideal for horde attacks. They are fairly balanced in all other aspects, making them suited for nearly any situation. However, ammo costs tend to be higher than most other firearms.
Light Machine Guns[]
Light machine guns offer incredible firepower, making them invaluable during large horde attacks. This all comes at a large cost in ammo, which is the highest in the game. They also reload slowly, making support from other survivors essential. Bandoliers and carrier harnesses negate the slow reload time. Due to the fact that defending a compound requires no ammo, this weapon would be handy to use in compound defense, in conjunction with Long Rifles.
Long Rifles[]
Rifles are a life saver in large maps with few obstacles as they can pick off enemies from a safe distance away. However, they tend to have a small magazine capacity and are mostly useless at close range due to a slow rate of fire and the minimum effective range. Also the staple weapon for raids.
Blunt[]
Blunt weapons generally have higher knockback than bladed weapons, but at the cost of either attack speed or damage per strike, making them less suited for killing. They also share the weakness all melee weapons have - survivors must be right next to their enemies to attack it.
Blades[]
Blades tend to either strike faster or harder than their blunt counterparts, but generally have lower knockback, increasing the chance of being swarmed. They also share the weakness all melee weapons have - survivors must be right next to their enemies to attack it.
Premium[]
Premium weapons include all other types of weapons in the game and are usually stronger than the regular weapons available at the same level. They can be only found in supply boxes and The Store.
Supply Boxes[]
Supply boxes usually carry exclusive weapons/items that are either unavailable through any other method or only available for a premium in ![]() from The Store. Boxes are locked and must be unlocked with special keycards, most of which are only obtainable from The Store or special community events.
from The Store. Boxes are locked and must be unlocked with special keycards, most of which are only obtainable from The Store or special community events.
- HERC Supply Boxes
- Beacon Parts Box
- Beacon Security Box
- HERC Tactical Response Box
- Nice Z-Mas Box
- Naughty Z-Mas Box
- Trick or Treat Trunk
- Winter Cache
- Premium Supply Box
- Premium Z-mas Box
- Mystery Clothing Box
- Premium Independence Box
Alliances[]
Alliances are a good way to get good relations with other survivors and help each other out. Primarily if you're considering joining an alliance, you may need to consider these ideas.
- Are you willing to fight for a cause you may not believe in/are you willing to sacrifice time and energy towards a group?
- Do you agree with the ideals of the group?
- Are you looking for war, or just a personal-defense group, or for trading?
- Are you willing to take the increased risk of possible raids?
These questions may help determine if an alliance is right for you. In addition, see if you can talk to the group's leader or a high-ranked member and learn what the group aims for and its overall member experience. Do NOT join an alliance that you may regret later on. Once you're in, leaders may consider you "in" forever. Choose wisely! But when you're in and want to get out, you can use the leave alliance button to opt out.
Creating an alliance[]
Deciding to create one is very hard. You will have to be prepared to take a massive burden on your shoulders. Your future members will look to you for support, leadership, and what to do. Disorganization and inactivity drives many members away. In your first few months, be prepared to have very few members.
Task and War Boost Rotations[]
Every war round, there is a given set of alliance tasks and war boosts. There are 4 different sets of these boosts/tasks which rotate predictably. The rotations are, as follows:[1]
- Boost Cost (per boost, per person, at beginning of round): 28.75
- Quotas: 4800 wood/metal/cloth, 1500 food/water, and 4200 ammo per player (not all are present in a given round.)
- Rotation 1 ("Round after Mega")
Tasks:
- Munitions (Donate Ammo)
- Groceries (Donate Food)
- Be Prepared (Find Gear on Manuals)
- Gun Stocks (Find Weapons on Manuals)
Boosts:
- Automission: +40% auto success chance
- Item: +10% more items, +10% chance of quality items
- Repair: -30% material cost, -50% repair time, +25% wood/metal/cloth dropoff rate
- Fuel: +15% more fuel drops
- Mega: +20% chance of crafting bonus, -25% crafting costs
- Rotation 2
Tasks:
- Find Ammunition (Loot Ammo)
- Gun Stocks (Loot Weapons)
- Water Supply (Donate Water)
- Wood Supply (Donate Wood)
Boosts:
- Crafting: -20% crafting costs, +15% chance of getting a crafting bonus
- Mission: -15% return time on manuals, +15% XP, +20% auto success chance
- Survivor: +20% survivor health, +15% morale
- Survival: -20% food & water consumption, +15% health
- Bonus: -25% return time from manuals, +10% chance of quality items, +10% more items, +10% dmg to zeds, +15% fuel drops, -15% repair time
- Rotation 3
- (Cloth + Metal donation round = round before "Mega Boost")
Tasks:
- Metal Supply (Donate Metal)
- Groceries (Donate Food)
- Cloth Supply (Donate Cloth)
- Munitions (Donate Ammo)
Boosts:
- Production: +20% ammo/wood/metal/cloth/food/water production rate
- Repair: -30% material cost, -50% repair time, +25% wood/metal/cloth dropoff rate
- Item: +10% more items, +10% chance of quality items
- Combat: -20% ammo cost, +20% dmg to zeds
- Bonus: +15% surv health, -25% return time on manuals, +20% basic resource production, +10% chance of crafting bonus, +15% fuel drops
- Rotation 4
- "Mega Boost"
Tasks:
- Water Supply (Donate Water)
- Munitions (Donate Ammo)
- Groceries (Donate Food)
- Wood Supply (Donate Wood)
Boosts:
- Fuel: +15% fuel drops
- Survival: -20% food/water consumption, +15% survivor health
- Crafting: +15% chance of getting a crafting bonus, -20% crafting costs
- Combat: -20% ammo cost on missions, +20% damage vs. infected
- Bonus: +25% more items, +25% chance of quality items, +30% mission XP, -35% return times on manuals.
Predicting Future Tasks[]
This information is useful because it allows alliances to plan ahead in the future.For example, if a water donation round was in the upcoming war round, one could prepare by filling their storage before the round (This was back in the great Dead Zone drought, when water dropped at approximately half the rate of food, therefore making the water task the hardest in the game, since water cannot be crafted like ammo, cannot be recycled like wood/metal/cloth, nor is abundant like food. On top of this, Kongregate did not have the Deathmobile Upgrade until March 14, 2016, which made the water task one that required diligence).
Preparing for the Mega Boost[]
Another use of the table is to keep track of the "mega boost" round, in which all the best boosts are available for that week. Alliances typically save tokens and don't buy boosts until the mega boost week. The mega boost round is typically dedicated to intense playing to farm out the map and get unique items. It is not uncommon to get 3 or more uniques in a day, however, due to the nature of random number generators, nothing is guaranteed.
Crafting Efficiently[]
The most important use of this reference, however, is to keep track of when and which boosts are available on a given week (most notably the crafting boost). Knowing when the crafting boost occurs and whether it lines up with a holiday event is important because most holiday events have crafting, and since crafting requires high volumes of production to yield good chances at high bonuses, any crafting cost reduction is imperative. Typically, to get the maximum 80% cost reduction, any combination of the following is used:
- Crafting on the Cheap (typically the 50% version for large runs)
- Box boosts (premium boxes, war boxes, event boxes, and anything else in between that can provide a boost. Just note that multiple boxes may need to be opened to roll a craft boost) Most provide 20% cost reduction.
- Alliance Boost (20-25% cost reduction)
These, combined with thousands of units of fuel allow for a player to have their best chance at getting a good craft, or to refine crafting kits to higher quality versions at a more affordable price. The Quality Crafts book is NOT recommended since it only changes the chance of getting a crafting bonus at all (typically very high chance already). It does not increase the magnitude or chance of getting a better crafting bonus on an item.
Notes[]
- ↑ Be warned that this strategy may make you more vulnerable to raiders. They may not be able to injure one of your survivors, but they are more likely to get at your storage buildings.
- ↑ Your survivors must be equipped with long-ranged weapons for this to work
- ↑ Beware that, using this strategy, your survivors will be far apart, possibly endangering them if the enemy does manage to break through
- ↑ If you're low on ammo, try running a mission in a Police Station/Gun Store/Security (Location)
- ↑ A Medic with gear that increases scavenging speed (i.e. Gloves) may be able to substitute as a scavenger
- ↑ It may be desirable to send the leader and lower-level survivors to high-level locations and the higher-level survivors to lower-level locations, in order to ensure that the low-level survivors get a chance to level up sooner
- ↑ Examples would be a barricade, a gun cage (Survivors can shoot through the cage), or the safe zone
- ↑ Traps cannot be seen until detected by a survivor. Exercise caution.
- ↑ Fuel is the only item that cannot be traded
- ↑ You can use this method to replace the "spare resources" method, mentioned above